


How to Install a TSP100 Ethernet or Wi-Fi Printer on Windows
Introduction
This application note provides instructions for installing a Star TSP100 Series Ethernet (LAN) or Wi-Fi printer on Windows using the futurePRNT Driver and Configuration Utility package.
Supported Printers: TSP100LAN, TSP100IIILAN, TSP100IIIW
Supported Interfaces: Ethernet (LAN), Wi-Fi
Supported Environments: Windows 11, Windows 10, Windows 8, Windows 7
Before you begin
Important! New installations require two steps: 1) Install the futurePRNT driver and 2) Add the printer to Windows. These two separate steps are explained below.
Note: If you have already installed the driver, skip to Step #2.
Note: These instructions were written using Windows 11. If you are using an earlier version of Windows some steps may differ.
1. Install the futurePRNT Driver
The most current version of the futurePRNT driver can be found HERE
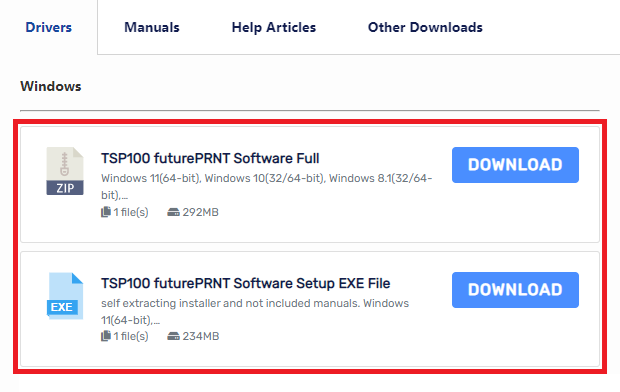
1. Click “Download” on either the Full or EXE version. Select “I Agree” and click “Download”.
Note: The Full driver download includes the printer/software manuals while the EXE version does not. For this application note, the Full version is used.

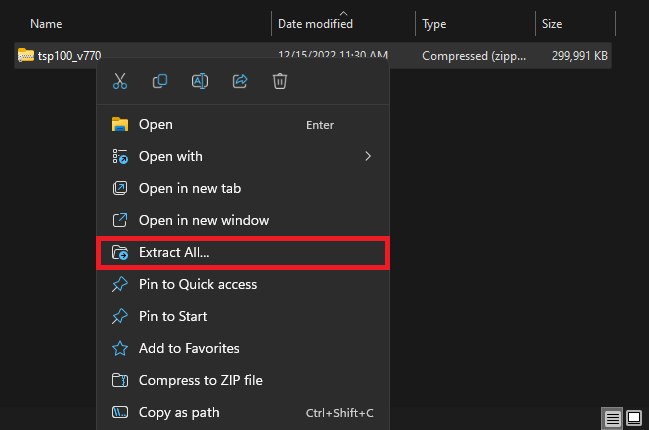
2. Locate the downloaded zip folder (commonly found in the Downloads folder). Right-click on the zip folder and select “Extract All…”.
Note: If the EXE file was downloaded, simply double-click the application to start the installation process and skip to Step 6.
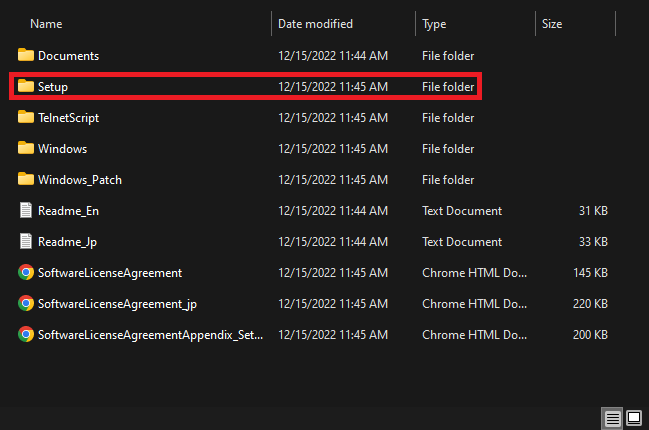
3. Open the newly extracted folder and open the “Setup” folder.

4. Open the “Setup” execution file.

5. Allow the app to make changes to your device and click “Next”.

6. Select “I Accept” and click “Next”.

7. Select “Typical” and click “Next”.

8. Click “Install”.

9. The installer completes the installation.
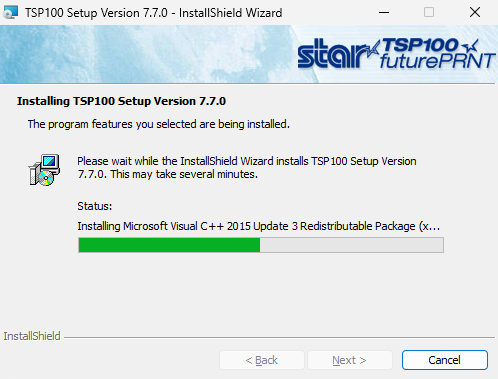
Note: You may receive a prompt during installation, examples below. Click “Yes” and/or “OK”. This will not affect the installation process.


10. Click “Finish”.

Congratulations! You have successfully installed the futurePRNT driver on Windows.
2. Add the Printer to Windows
1. Determine the printer’s IP Address on the network. This can be found at the bottom of the printer’s self-test under Current IP Parameters Status. Use the steps in the following article to do so.
How to Perform a Hardware Self-Test on Star Printers
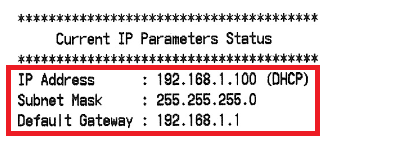
2. Click the Windows/Start Menu icon. Search for and open “LAN & Bluetooth Setup Tool“.
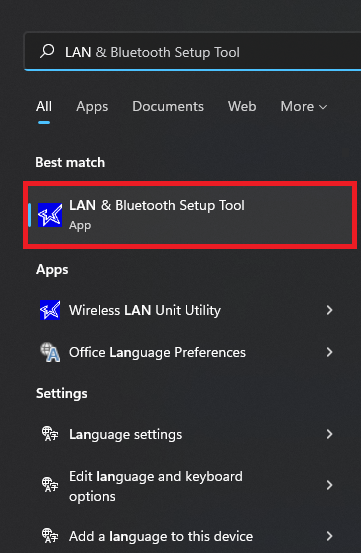
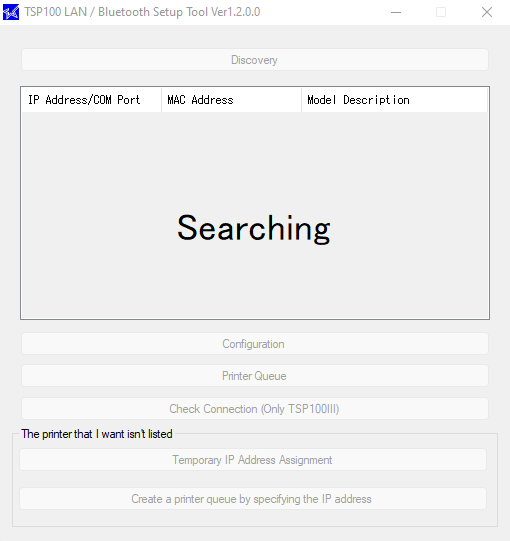
3. Let the Utility Tool search for the printer.
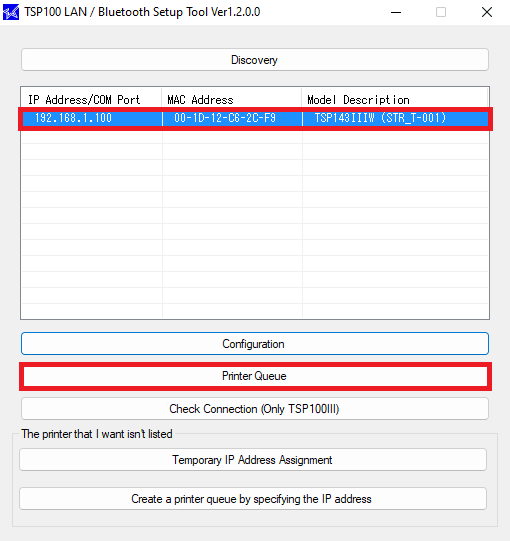
4. Once the printer is discovered, highlight it and click “Printer Queue”.
Note: If the printer does not show up in the list of Discovered printers, please proceed to the “Install Network Printer (Manually)” steps in the next section.
5. If you intend to use the default IP Address (DHCP) assigned by the router, click “Yes”.
Note: If you would like to assign the printer a Static IP, click “Configuration” and follow the steps in the link below. When you return to this step, click “Discovery” again to search for the printer’s updated IP Address.
How to Assign a Static IP Address to an Ethernet or Wi-Fi Printer
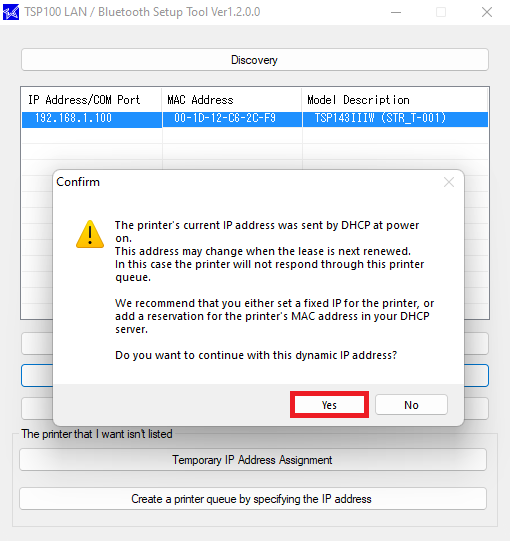
6. Select “Print Test Page” and click “Apply”.
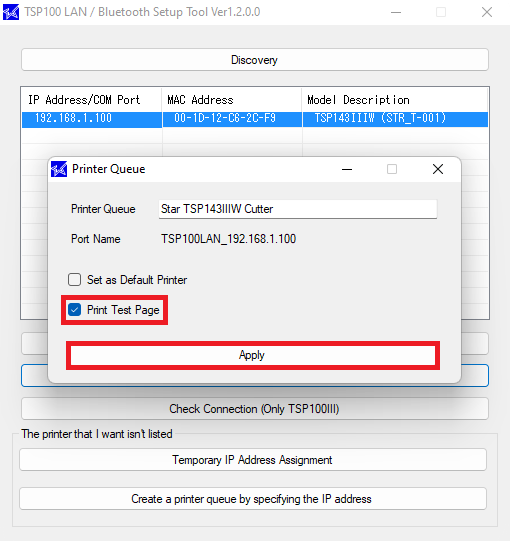
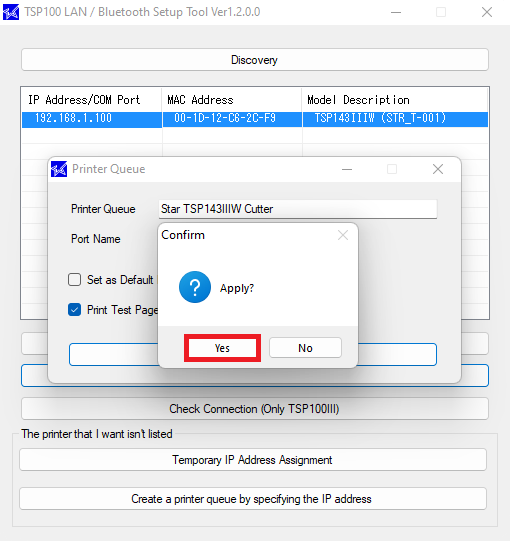
7. Confirm the changes and click “Apply”.
8. A Windows test page will print confirming that the printer was successfully installed. You can choose to access the TSP100 Configuration Utility, otherwise click “No” and exit the Setup Tool.
Note: The TSP100Configuration Utility is a tool that allows for customization and configuration of printer settings.

Congratulations! You have successfully installed the TSP100 Ethernet (LAN) or Wi-Fi printer on Windows.
2.1 What if my Printer does not Populate in the LAN & Bluetooth Setup Tool
Note: These steps will show how to add a printer if it is not found automatically in the LAN & Bluetooth Setup Tool.
1. Determine the printer’s IP Address on the network. This can be found at the bottom of the printer’s self-test under Current IP Parameters Status. Use the steps in the following article to do so.
How to Perform a Hardware Self-Test on Star Printers

2. Click the Windows/Start Menu icon. Search for and open “LAN & Bluetooth Setup Tool“.
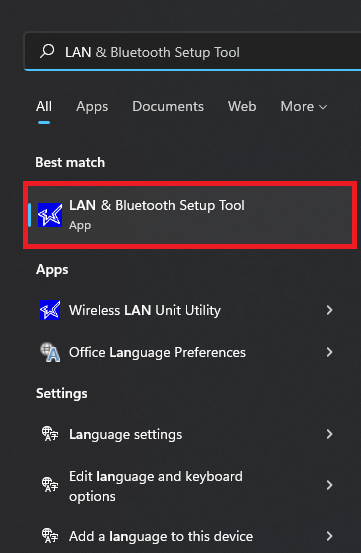
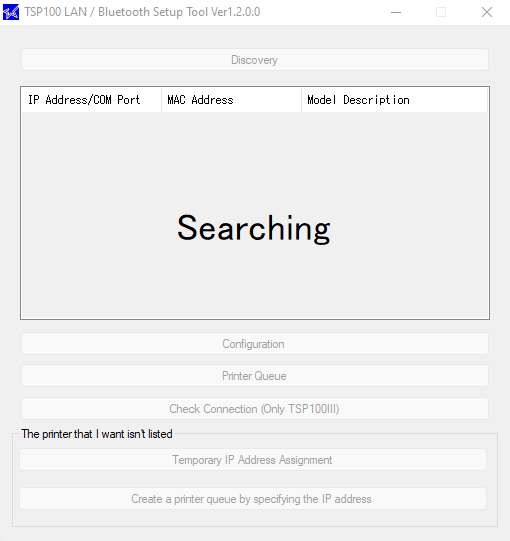
3. Let the Utility Tool search for the printer.
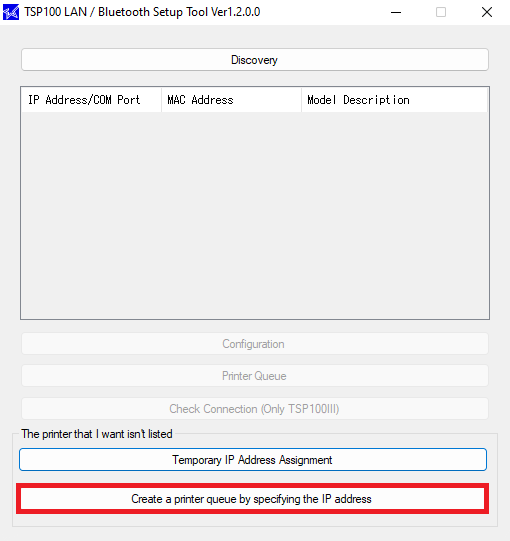
4. If the printer is not found automatically over the network, click “Create a printer queue by specifying the IP address”.
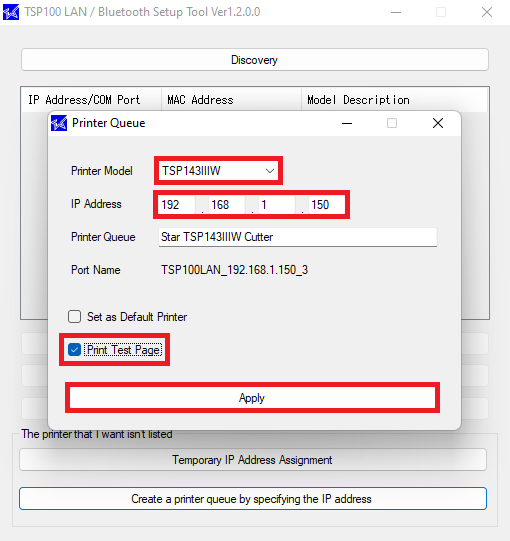
5. Input the following and click “Apply“:
Printer Model: Select your model printer
IP Address: Enter the printer’s IP Address (found in step 1)
Print Test Page: A test print will happen automatically (it may take up to 20 seconds)
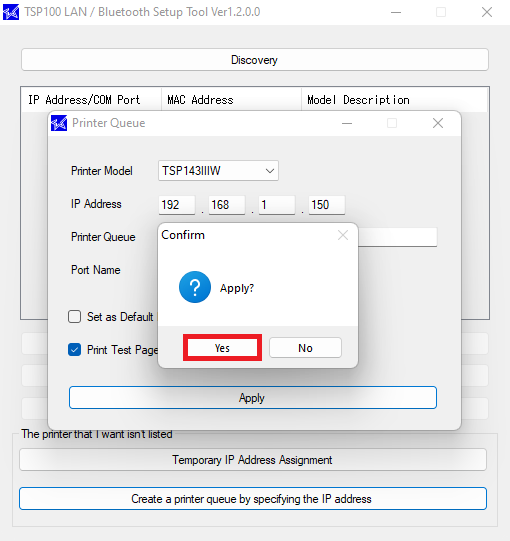
6. Confirm the changes and click “Apply”.
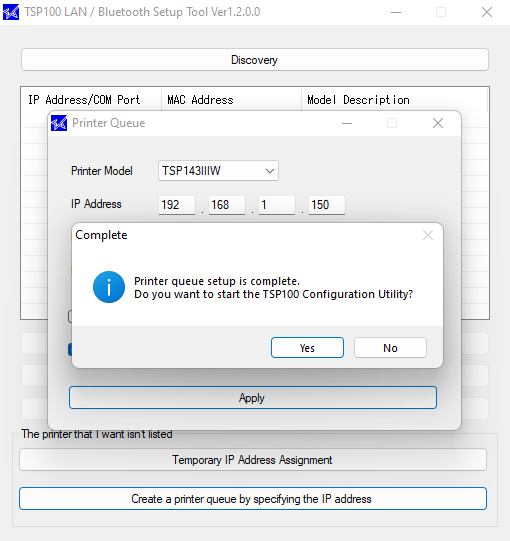
7. A Windows test page will print out confirming that the printer was successfully installed. You can choose to access the TSP100 Configuration Utility, otherwise click “No” and exit the Setup Tool.
Note: The TSP100Configuration Utility is a tool that allows for customization and configuration of printer settings.
Congratulations! You have successfully installed the TSP100 Ethernet (LAN) or Wi-Fi printer on Windows.
See also
How to Assign a Static IP Address to an Ethernet or Wi-Fi Printer
How to Reset an Ethernet (LAN) or Wi-Fi Printer
How to Enable a Cash Drawer on Windows
How to Configure a Star Printer to Cut In-Between Pages
How to Configure Margins and Paper Size on Windows
How to Install a TSP100 Bluetooth Printer on Windows
How to Install a TSP100 USB Printer on Windows
 English
 Español
 Português do Brasil
 Français
 ไทย
ไทย 日本語
日本語